Archives August 2026

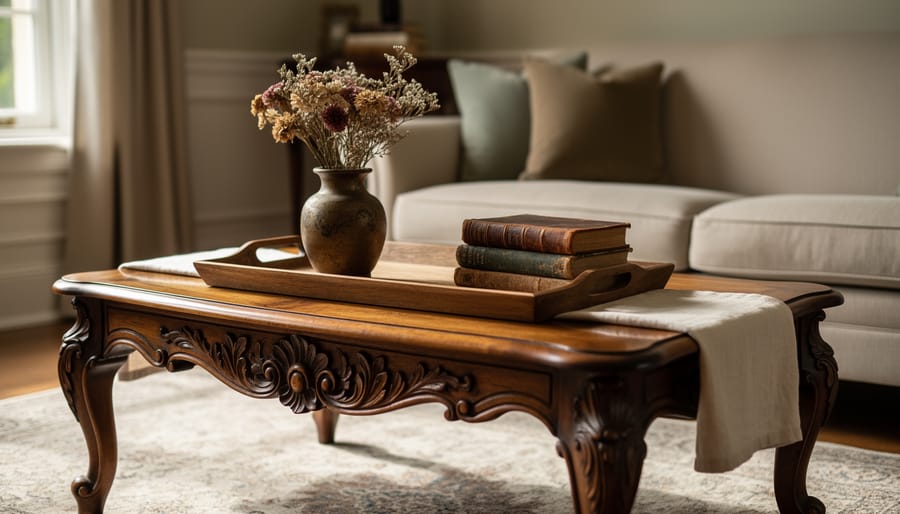
An antique carved walnut coffee table styled with a protective tray, vintage books, and a ceramic vase in a warmly lit living room.

How to Style an Antique Coffee Table (5 Easy Steps to Timeless Elegance)

Styling an antique coffee table comes down to five key steps: protect the finish, anchor with symmetry, layer in height variation, add curated objects that complement the table’s era, and leave breathing room. The entire process takes about 15 minutes once you’ve gathered your pieces, and you don’t need any special design training to pull it off beautifully.

Your antique table deserves an approach that honors its character while making it functional for everyday life. Unlike modern pieces that can handle heavy styling, antique surfaces need protection from moisture rings, scratches, and heat damage. That means you’ll work smarter with fewer, more intentional pieces rather than overcrowding the space.

The beauty of this method is its flexibility. Whether you’re working with a Victorian carved walnut table or a mid-century modern piece with tapered legs, the same core principles create visual balance while preserving the craftsmanship that makes your table special. You’ll learn exactly which objects work best, how to arrange them without overwhelming the patina you love, and simple techniques to check your work as you go.

This guide walks you through the materials you’ll need (most of which you likely already own), specific precautions to protect delicate finishes, and a clear five-step process that works regardless of your table’s style or condition. You’ll also get targeted tips for different antique periods and answers to the most common questions about protecting vintage wood while keeping your space both stylish and livable.

Key Takeaway: Match your styling intensity to your table’s aesthetic, ornate Victorian pieces need restraint to let their details shine, mid-century modern tables thrive with minimal clean-lined objects, rustic farmhouse styles welcome layered natural textures, and carved Asian or exotic wood tables deserve fewer but culturally meaningful pieces that respect their craftsmanship.

What You’ll Need to Style Your Antique Coffee Table

Gathering the right materials before you start makes styling your antique coffee table easier and more enjoyable. You won’t need anything expensive or specialized, most items you likely already own or can find around your home.

Here’s what to collect:

  • Decorative objects: Coffee table books, decorative trays, vases or bowls, candles or candlesticks to create visual interest and layers
  • Greenery or florals: Fresh flowers, potted plants, or quality faux stems to bring life and color to your arrangement
  • Textiles: Coasters, a small table runner, or decorative cloth napkins to protect the antique surface while adding softness
  • Cleaning supplies: Soft microfiber cloths, wood cleaner appropriate for antique finishes (avoid all-purpose sprays), furniture wax or polish if needed
  • Measuring tape: For checking proportions and ensuring your styling pieces fit the table’s scale without overwhelming it

Each category serves a specific purpose. Decorative objects provide the foundation of your styling and establish the overall aesthetic. Greenery adds an organic element that softens the formality of antique wood. Textiles protect your table from scratches, water rings, and heat damage, critical for preserving an antique’s finish and value. Proper cleaning supplies ensure you care for the piece correctly, since harsh chemicals can strip original patina or damage delicate finishes. The measuring tape might seem unnecessary, but it prevents the common mistake of choosing objects too large or small for your table’s dimensions.

Having everything within reach lets you experiment freely and find the perfect arrangement.

Before You Begin: Protecting Your Antique Piece
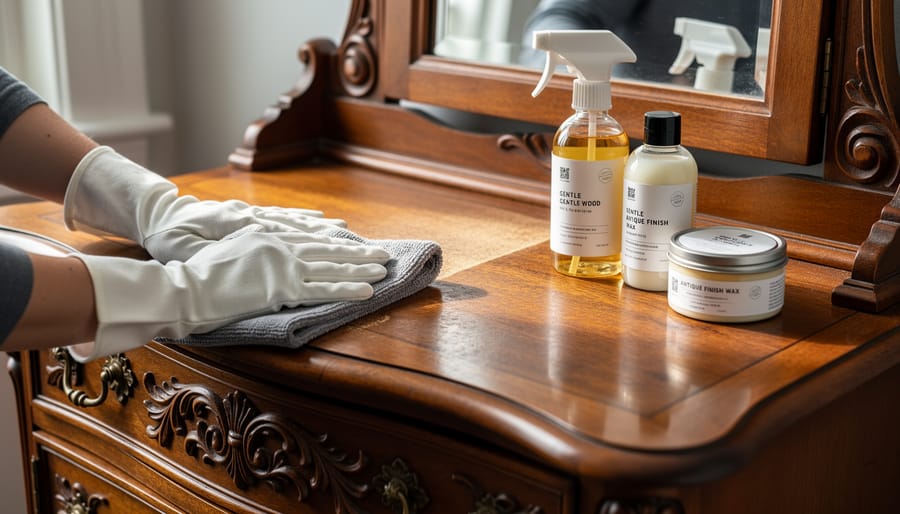
Microfiber cloth wiping the wood grain of an antique coffee table with gentle cleaner nearby.
Gentle cleaning and careful product choice help protect an antique finish while restoring its natural patina.

Your antique coffee table is more than a surface, it’s a piece of history that deserves care before you start styling. A few simple precautions will protect its finish, structure, and value while you create a beautiful display.

First, start with gentle cleaning appropriate to your table’s finish. Identify whether it has a wax, shellac, lacquer, or oil finish, because each reacts differently to moisture and products. Always test any cleaner on a hidden spot underneath the table first. Skip harsh chemicals and silicone sprays that can strip the patina or leave cloudy residue.

Warning: Water rings and heat damage can permanently mar antique finishes. Always use coasters under drinks and trivets under candles or warm objects.

Consider your table’s structural integrity before loading it with heavy books or substantial trays. Delicate turned legs, thin veneer, or loose joinery can’t support the same weight as a modern piece. If you notice any wobble or previous repairs, distribute weight evenly and keep heavier items closer to the table’s center rather than the edges.

Understanding your antique’s finish and limitations isn’t fussy, it’s the foundation for styling that lasts. You want your table to look stunning and stay that way, not develop damage that mars both its beauty and its worth. Protection comes first, then creativity.

Step-by-Step: How to Style Your Antique Coffee Table
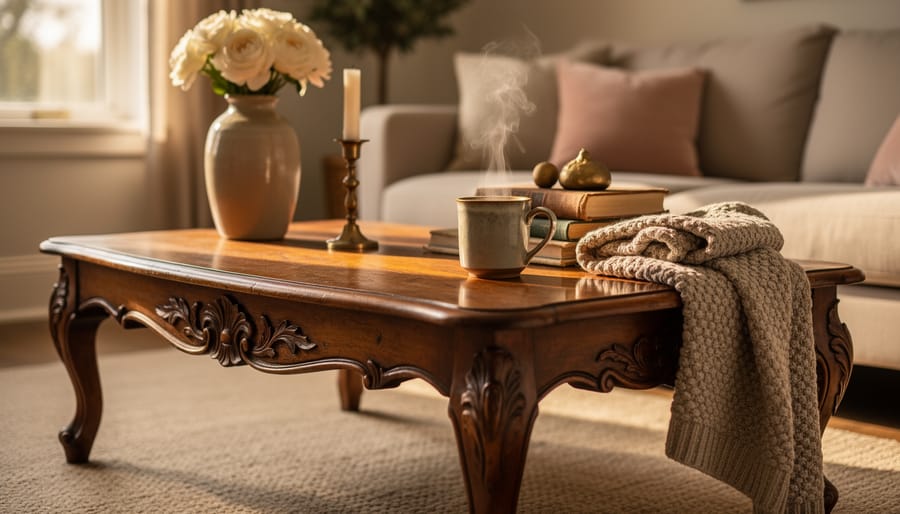
Antique coffee table styled with a brass tray, vintage books, a candle, and greenery in a cozy living room.
A styled antique coffee table demonstrates how layered height, texture, and warm accessories create timeless elegance.

Step 1: Clean and Assess Your Table

Start with a gentle dusting using a soft, lint-free cloth. For deeper cleaning, match your product to the finish, use a barely damp cloth with mild soap for lacquer or polyurethane, and specialty wax or oil for older finishes. Test any cleaner on an inconspicuous spot first. While you clean, take note of the table’s dimensions, shape (round tables need circular styling flow, rectangular ones work with grouped zones), and wood tone. Notice the patina, those aged marks and color variations tell the story and shouldn’t be hidden. Understanding these characteristics now will guide every choice you make as you decorate a coffee table with antique character. Measure the usable surface area so you know how much real estate you’re working with for styling.

Step 2: Choose Your Anchor Piece
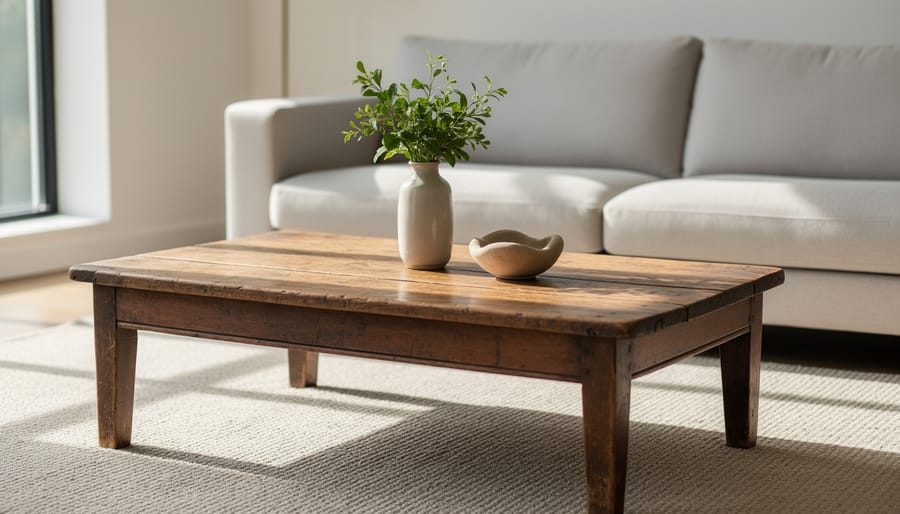
Antique-style coffee table with a centered tray and carefully spaced decor leaving clear space for everyday use.
Leaving breathing room around a centered anchor piece helps an antique coffee table feel balanced, functional, and visually calm.

Every successful coffee table arrangement starts with an anchor piece, one substantial item that grounds your entire display. This could be a decorative tray, a stack of three to five oversized books, a large ceramic bowl, or a sculptural object. The anchor should feel weighty enough to command attention without overwhelming your antique table’s character.

For positioning, use the rule of thirds: imagine your table surface divided into a tic-tac-toe grid. Place your anchor where the lines intersect rather than dead center. On rectangular tables, position it off-center lengthwise, about one-third in from either end. Round or oval tables work beautifully with the anchor slightly off-center or, if you prefer symmetry, centered with balanced elements radiating outward. Square tables offer flexibility, try an asymmetrical corner placement for visual interest, or center the anchor and build around it.

Choose an anchor that complements your table’s finish. A brass tray highlights warm wood tones, while a ceramic bowl in soft neutrals pairs elegantly with darker antiques. The anchor sets your styling direction, so pick something you genuinely love.

Step 3: Layer with Height and Texture

Now that your anchor piece is in place, it’s time to build dimension. Flat surfaces look boring, your eye needs highs and lows to travel across the table.

Stack two or three coffee table books next to your anchor, placing a small decorative object on top. Add a candlestick or slender vase on the opposite side. Vary the heights dramatically, if your anchor sits at six inches, aim for items at three inches and ten inches to create visual rhythm.

Texture matters just as much as height. Antique wood begs for contrast: smooth brass candlesticks catch light beautifully against matte oak, while a ceramic bowl adds soft curves to counter angular grain patterns. Glass vases stay light and airy, preventing heaviness. Woven baskets or linen-wrapped stems introduce natural fibers that echo the organic quality of aged wood.

Use the triangle method to arrange these elements. Imagine connecting your three tallest pieces with invisible lines, they should form a triangle, not a straight row. This creates balance that feels natural rather than staged, guiding the eye around the entire surface instead of stopping in one spot.

Step 4: Add Life and Personal Touches

Now bring your antique coffee table to life with elements that make it uniquely yours. Fresh flowers or high-quality faux greenery add instant warmth, a small vase of eucalyptus, a potted succulent, or seasonal blooms soften the hard surfaces and create a welcoming feel.

This is where your personality shines through. A vintage magnifying glass, a treasured family photo in an ornate frame, or a collection of antique keys tells your story while honoring the table’s heritage. Choose one or two meaningful objects rather than crowding the surface with sentiment.

Let your table’s era guide your choices. Victorian pieces love romantic touches like old books with leather bindings, crystal bud vases, or cameo dishes. Mid-century modern tables pair beautifully with sculptural ceramics and a single dramatic bloom in a minimalist vessel. Rustic farmhouse styles welcome woven baskets, dried wheat bundles, or galvanized metal containers.

Seasonal swaps keep your styling fresh without requiring a complete overhaul. Autumn branches, winter pinecones, spring tulips, or summer lemons in a bowl celebrate the changing year while respecting your table’s timeless character.

Step 5: Edit and Refine

Stand back at least six feet from your table and take a critical look. Your eye should move smoothly across the arrangement without any one spot feeling too heavy or empty. If something catches your attention in a jarring way, it probably needs to go.

Now get practical. Can you actually set down a cup of coffee without rearranging everything? Is there room for the remote control you use daily? Your antique table needs to function in real life, not just look pretty for photos. Reserve at least a third of the surface for actual use.

Sit in each seating position around your coffee table. Can you see the person across from you without peering around a tall vase? Does anything block your view of the TV if that matters in your room?

Make small tweaks to spacing. Items shouldn’t touch each other or the table edge. Leave breathing room. Sometimes shifting a stack of books two inches to the left makes all the difference. This editing phase separates adequate styling from truly refined design.

How to Know Your Styling Works

Step back from your table and take a critical look. Your eye should travel naturally around the arrangement without getting stuck in one spot or feeling overwhelmed. There should be visible breathing room, empty space is just as important as the objects you’ve placed. If everything feels crowded or chaotic, remove one or two items.

Test functionality next. Can you set down a cup of coffee without moving things around? Is there space for a book or remote? An antique coffee table still needs to work for daily life, not just look pretty.

Check style cohesion by considering the room as a whole. Does your styling complement your existing furniture and decor? The antique table should feel like an intentional part of your space, not an isolated vignette.

Refresh your styling with the seasons, swap florals for fall branches, or lighter pieces for summer. As your room evolves, your coffee table can too. These same designer styling steps apply whether you’re starting fresh or updating what you have.

If you’re unsure whether your arrangement works or want personalized guidance for your specific antique piece, online design support can help you refine your styling choices and build confidence in your design decisions.

Styling Tips by Antique Coffee Table Type

Different antique styles speak different design languages, and your styling approach should honor each one’s unique character. What works beautifully on a carved Victorian piece might overwhelm a sleek mid-century table, so tailoring your decor to the table’s era creates harmony rather than conflict.

For Victorian ornate tables with carved legs and decorative inlays, less is genuinely more. These pieces already command attention with their intricate details, so keep your decor minimal. A single sculptural object, perhaps a vintage brass bowl or an elegant crystal vase with a simple floral arrangement, lets the table’s craftsmanship take center stage. Avoid covering large portions of the surface or creating clutter that competes with the table’s built-in drama.

Mid-century modern antique tables with their clean lines and tapered legs call for a minimalist approach that echoes their streamlined aesthetic. Think a small stack of design books with bold graphic covers, a single ceramic piece in a saturated color, or a low-profile sculptural candleholder. Keep edges visible and surfaces mostly clear. The beauty here lies in negative space and intentional placement rather than abundance.

Rustic farmhouse tables invite warmth and texture. Layer natural materials freely, a woven basket holding throw blankets, a chunky wooden dough bowl filled with seasonal items, mason jars with wildflowers, or a weathered metal tray. These tables can handle a more collected, lived-in look that feels gathered over time rather than carefully curated.

Carved Asian or exotic wood tables deserve reverence for their cultural heritage and craftsmanship. Use fewer pieces with greater intention. A simple bonsai or orchid, a handcrafted tea set, or a single piece of pottery that complements the wood’s tone and the table’s origin shows respect for the aesthetic tradition. Let the intricate carving patterns remain visible and avoid Western decor that clashes with the table’s cultural context.

Common Questions About Styling Antique Coffee Tables

How many items should I place on an antique coffee table?

Three to five thoughtfully chosen items create visual interest without overwhelming the table’s character. Use the rule of odds, groupings of three or five feel more natural than even numbers, and always leave some open surface visible to honor the beautiful wood.

Can I mix modern decor with an antique table?

Absolutely. Pairing contemporary accessories with an antique coffee table creates dynamic contrast and prevents your room from feeling like a museum. A sleek glass vase or modern art book alongside vintage brass candlesticks bridges old and new beautifully.

How do I style a very small antique coffee table?

Stick to one anchor piece, a small tray or single stack of books, then add just one or two complementary items like a petite vase or candle. Small tables demand restraint, so embrace minimalism and let the table itself be the star.

What if my antique table has damage or imperfections?

Those marks tell the table’s story and add authentic character. Rather than hiding scratches or worn spots, work around them by placing a decorative tray or stack of books over the most damaged areas while celebrating the patina elsewhere as part of the table’s charm.

How often should I restyle my antique coffee table?

Seasonal refreshes, four times a year, keep your space feeling current without constant fussing. Swap florals for seasonal greenery, rotate books, or switch candle scents, but keep your core arrangement intact so the table maintains its role as a grounding element in your room.

Should I use a tray on an antique surface?

A tray protects the finish from spills and rings while corralling smaller items into a cohesive grouping. Choose one that complements your table’s era, a silver tray for Victorian pieces, a wooden or woven tray for farmhouse styles, and make sure it has felt pads on the bottom to prevent scratches.

These questions capture the real hesitations people have when styling antique pieces. The beauty of working with antiques is that there’s no single right answer, your personal style and the table’s unique personality should guide your choices. If you’re still uncertain about how to make your specific antique coffee table work in your space, remember that styling is an evolving process. Start with the basics from these steps, live with your arrangement for a week, then adjust based on how you actually use the table daily.

Styling your antique coffee table is all about balance. You’re honoring a piece with history while making it work for how you actually live today. Don’t be afraid to experiment, move things around, swap out accessories with the seasons, and trust your instincts. What feels right to you is usually right for your space.

The beauty of coffee table styling is that it’s never truly finished. As your life changes, your styling can change too. That stack of design books might become a collection of travel mementos next year, and that’s exactly how it should be.

If you’d like personalized guidance tailored to your specific antique piece and room, I’d love to help. At A Design Difference, we offer virtual design consultations that show you how seamless design works in your home, no matter where you’re located. Let’s create a look that celebrates your antique table’s character while making your space truly yours.

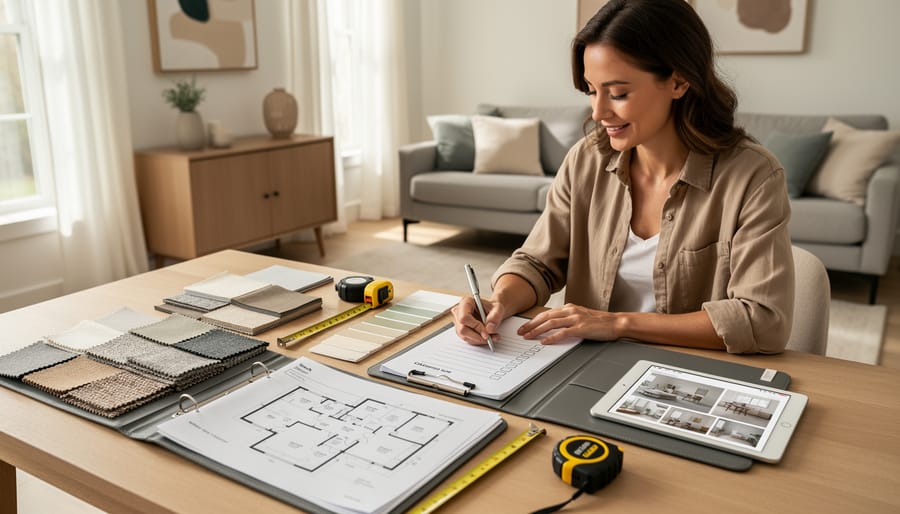
Client and interior designer reviewing a design brief with a notebook, printed materials, swatches, and a tape measure at a dining table in a bright home.

How to Brief an Interior Designer Before Your First Meeting (and Get Better Results)

Briefing an interior designer before your first meeting takes about two to three hours of focused preparation, but it can save you weeks of back-and-forth and hundreds of dollars in revision fees. The process involves gathering visual inspiration, documenting your space with photos and measurements, listing your functional needs and budget parameters, and organizing everything into a clear, written brief that your designer can reference throughout the project.

Most first-time design clients walk into consultations unprepared, armed only with vague ideas like “I want it cozy” or a single Pinterest board. That approach wastes your consultation time on basic discovery questions instead of actual design strategy. Your designer can’t read your mind, and without concrete information about how you live in your space, what you’re willing to spend, and what success looks like to you, even the most talented professional will struggle to deliver results you’ll love.

Think of your brief as a creative roadmap. You’re not expected to have all the answers or make design decisions on your own. That’s what you’re hiring expertise for. But you do need to provide the raw materials: your lifestyle requirements, aesthetic preferences, practical constraints, and deal-breakers. The clearer and more thorough your preparation, the more your designer can focus on solving your specific challenges rather than guessing what matters most to you. This preparation works beautifully for virtual consultations too, where having everything documented upfront becomes even more valuable.

Key Takeaway: A strong design brief must include five elements: a clear budget range, a realistic timeline, specific functional needs for the space, curated visual inspiration that represents your style, and identified problems you need the designer to solve.

What You Need to Gather Before Your Consultation

Person organizing room photos, measurements, and a mood board materials on a dining table.
A client preparing materials for an interior design consultation makes the process feel structured and less overwhelming.

Before you meet with an interior designer, gathering the right materials transforms a vague conversation into a focused, productive session. Think of this as building your design toolkit, the more organized you are, the better your designer can help you. Whether you’re working with a Sydney interior design studio or connecting virtually, these essentials ensure you get the most from your first consultation.

Start with your budget range. You don’t need an exact figure down to the dollar, but knowing whether you’re working with $5,000 or $50,000 changes everything about what’s possible. Be honest here, designers aren’t there to judge your budget, they’re there to maximize it.

Next, measure your space accurately. Grab a tape measure and record room dimensions, ceiling heights, window sizes, and door locations. Include any awkward architectural features like columns, sloped ceilings, or radiators that can’t be moved. Rough sketches with measurements beat perfect floor plans with no numbers.

Photograph your current space from multiple angles. Capture each room from different corners, close-ups of problem areas, and details like light switches or outlets that might affect furniture placement. Take these photos during daylight to show natural light conditions, it matters more than you’d think.

Here’s your complete gathering checklist:

Budget range (realistic minimum and maximum you can spend)
Room measurements (length, width, height, windows, doors)
Current space photos (multiple angles, daylight conditions)
Inspiration images (Pinterest boards, magazine clippings, saved photos)
Timeline expectations (when you need the project finished)
Must-keep items (existing furniture or fixtures you want to retain)
Functional requirements (storage needs, how you use each space)

Collect inspiration images that genuinely speak to you, not what you think looks impressive. Twenty images that make you feel something beat two hundred random saves. Note what specifically draws you to each, is it the color, the layout, the lighting, or the overall mood?

Document your timeline realistically. If you’re hosting a wedding in three months, say so. If you have flexibility, mention that too. Designers can adjust their approach based on urgency, but they need to know upfront.

Finally, list any existing pieces you want to keep. That vintage dresser from your grandmother or the sofa you just bought, designers can work around these anchors, but only if they know about them from the start.

Questions to Ask Yourself (Before the Designer Asks You)

Before your designer asks probing questions in that first consultation, take time to answer them yourself. This self-reflection exercise transforms vague ideas into concrete direction, making you a better collaborator and helping your designer deliver solutions that actually fit your life.

What’s genuinely not working in your current space? Be specific. “The living room feels off” is harder to solve than “We can’t all sit together comfortably when we have guests” or “There’s no good spot to put drinks down.” Identify the functional frustrations, not just aesthetic ones. Does the morning light blind you at your desk? Is there nowhere to drop keys and bags when you walk in? These pain points guide practical solutions.

How do you actually use each room? Your dining room might double as a homework station. Your bedroom might need to function as a reading retreat. If you’re planning a home office layout, think about whether you take video calls, need dual monitors, or require soundproofing from the rest of the house. The gap between how rooms are supposed to be used and how you actually live in them reveals what your design needs to accommodate.

What’s your absolute non-negotiable must-have? Maybe it’s keeping your grandmother’s sideboard, accommodating your massive book collection, or ensuring the new sofa fits your two large dogs. Identify the one or two things that genuinely can’t be compromised, so your designer works around them rather than suggesting you get rid of them halfway through the project.

Note: Be honest about your real budget and lifestyle habits rather than presenting what you think sounds impressive, designers create better solutions when they know the truth.

What design styles make you feel at home? You don’t need to know whether you’re “modern farmhouse” or “transitional.” Instead, think about spaces where you’ve felt comfortable and energized. Was it a friend’s cozy, layered living room or that clean-lined hotel lobby? Do you gravitate toward warm woods or sleek metals? Answering these questions in your own words gives your designer authentic insight into your preferences, which matters more than correctly labeling a style.

How to Create Your Design Brief Step-by-Step

Organizing Your Visual Inspiration

Home office with a stack of inspiration photos on a desk under warm side lighting.
Clear inspiration helps the designer understand the vibe you want for your day-to-day space.

Start by creating one main digital folder or Pinterest board labeled with your project name and date. Inside, organize your inspiration images into specific categories: “color schemes I love,” “furniture styles,” “room layouts,” and “specific details” (like lighting fixtures or tile patterns). This structure helps your designer spot patterns in what you’re drawn to, rather than wading through a random collection of pretty rooms.

Aim for 10-15 images total across all categories. Quality beats quantity here, a focused selection reveals your preferences much faster than 200 saved pins. If you’ve got more, narrow it down by asking yourself: “What specifically am I showing my designer with this image?” Delete anything that’s just generally nice but doesn’t illustrate a clear preference.

Label or annotate your favorites with quick notes. Write “love this paint color, not the furniture” or “want this exact layout for our kitchen.” These clarifications prevent your designer from guessing which element caught your eye. For virtual consultations, save everything in a shareable format, a Google Drive folder, Dropbox link, or shared Pinterest board your designer can access before your meeting. Don’t email 50 attachments; one organized link is infinitely more useful.

Documenting Your Functional Needs

Your designer needs to know how you actually live in your space, not just how you imagine it should look. Start by listing the activities that happen in each room. Does your living room double as a home office on Tuesdays and Thursdays? Do your kids do homework at the kitchen table every evening? These details shape everything from furniture placement to lighting choices.

Document your storage honestly. Count how many coats actually hang by your door, how many pairs of shoes pile up in the entryway, where toys tend to migrate. If you’re constantly tripping over gym bags or stashing mail in random drawers, write that down. A good brief acknowledges real clutter patterns rather than pretending they don’t exist.

Traffic flow matters more than most people realize. Note where people naturally walk through rooms, which doors get used most, where pets sleep or play. This information helps your designer create seamless design that works with your daily routines instead of against them.

Be specific about lifestyle factors. “We entertain” is vague. “We host dinner parties for six people monthly and need flexible seating” gives your designer something actionable. The same goes for work-from-home setups, pet accommodations, or accessibility needs.

Presenting Your Information for Virtual Consultations

Open laptop on a coffee table suggesting a remote interior design consultation with a tidy living room in the background.
A well-prepared brief supports smoother virtual collaboration by making your goals easy to review and discuss.

Virtual consultations require a slightly different approach to presenting your brief. Share everything digitally before your meeting, most designers prefer PDF documents that won’t lose formatting across different devices. Name your files clearly: “Smith_Living_Room_Measurements.pdf” works better than “IMG_4783.jpg”.

For photos, bigger is better. Take images in landscape mode with good natural lighting, capturing whole walls and corners rather than artistic close-ups. Upload originals to a shared folder on Google Drive or Dropbox instead of texting compressed versions that lose detail. Your designer needs to see that scuff on the baseboard and the weird angle where your ceiling slopes.

Organize everything into clearly labeled folders: Measurements, Current Space Photos, Inspiration, Furniture to Keep. Many designers who run an online design process will provide a specific intake form or template, but having your materials ready means you can complete it quickly and thoroughly. Test your sharing permissions before the meeting, there’s nothing worse than spending half your consultation troubleshooting file access instead of talking about design.

Common Briefing Mistakes to Avoid

Even the best intentions can get lost without the right preparation. These common briefing mistakes waste valuable consultation time and can lead to designs that don’t actually work for your life or budget.

The biggest pitfall is dancing around your real budget. Designers need honest numbers to create plans you can actually implement. If you say “flexible” when you mean $5,000, you’ll end up with a $15,000 proposal that excites you but goes nowhere. Be specific about what you can spend, and include whether that’s for design fees only or for the entire project including furniture and materials.

Warning: Saying your budget is “flexible” or “open” when you have a firm limit leads to designs you can’t afford and wastes both your time and your designer’s expertise.

Another mistake is showing wildly conflicting inspiration images. If your Pinterest board jumps from minimalist Scandinavian to maximalist bohemian to industrial loft, your designer won’t know which direction actually speaks to you. It’s fine to like different styles, but identify what specifically draws you to each image so your designer can find the common thread.

Guessing at measurements instead of measuring accurately creates real problems. That sofa you love might not fit through your doorway, or the layout you’re imagining might leave you with twelve inches of awkward leftover space. Take the time to measure properly, including doorways, ceiling heights, and window placements.

Setting unrealistic timelines derails projects before they start. Saying you need a full home redesign in two weeks, or expecting custom furniture to arrive next month, sets everyone up for disappointment. Ask your designer about realistic timeframes during your consultation.

Finally, don’t skip lifestyle details. Mentioning that you have two large dogs or work from home three days a week isn’t oversharing, it’s essential information that affects every design decision. If you’re planning a paint color check, tell your designer about your lighting situation and daily routines so the colors work in real life, not just in the sample.

How to Know Your Brief Is Ready

Your brief is ready when it gives your designer a clear picture of who you are, what you need, and what success looks like for your space. Before you hit send or walk into that meeting, run through this quick verification checklist.

A complete brief should answer five essential questions: What’s your budget? What’s your timeline? How do you use the space? What style speaks to you? And what problems are you trying to solve? If your designer can answer all five from reading your brief, you’re in good shape.

Check that your photos actually show the space accurately, not just flattering angles. Your measurements should include ceiling height, window dimensions, and any architectural quirks like sloped ceilings or awkward alcoves. If you’ve listed “modern” as your style, make sure your inspiration images back that up rather than showing farmhouse kitchens and traditional moulding.

You’ll know you’re ready when a friend could read your brief and describe your project back to you without confusion. If parts feel vague or contradictory, your designer will feel that too.

Once your brief is complete, schedule your consultation with confidence. Share the brief 24-48 hours before your meeting so your designer can review it properly. This advance notice means they’ll arrive prepared with initial ideas rather than spending your first session just gathering information. You’ve done the groundwork, now you’re ready for the creative collaboration to begin.

Frequently Asked Questions

How detailed should my brief be?

Your brief should be thorough enough to communicate your vision and needs, but don’t stress about perfection. Include the essentials, budget, measurements, timeline, and lifestyle needs, then add as much visual inspiration and detail as feels comfortable. Most designers prefer a clear brief with too much information over one that’s too vague, since they can always ask clarifying questions.

Do I need a brief for a single room project?

Yes, even small projects benefit from a brief. A one-room redesign still requires budget boundaries, measurements, functional needs, and style direction. The brief might be shorter, but it’s just as valuable for making your consultation productive.

What if I don’t know my style yet?

That’s completely normal and your designer can help you define it. Gather images of spaces you’re drawn to, even if you can’t name the style, and note what you don’t like. This gives your designer starting points to ask the right questions and show you options that help clarify your preferences during the consultation.

Should I brief differently for virtual design services?

Virtual consultations need slightly more detail in your written brief and better quality photos since your designer can’t walk through the space in person. Make sure your measurements are accurate, include photos from multiple angles, and clearly label any existing furniture you’re keeping. The preparation process is otherwise the same.

Can I change my brief after the first meeting?

Absolutely. Your brief is a working document, and it’s common to refine your vision after discussing it with a professional. Send updates as you think of things or as your priorities shift, especially in the early stages of your project.

These questions come up frequently because first-time design clients worry about getting it wrong. The reality is that your brief is meant to start a conversation, not end it. Your designer will use it as a foundation and ask follow-up questions to fill in gaps or clarify contradictions. Think of it as giving them a head start rather than delivering a final exam, the goal is collaboration, not perfection.

If you’re working with a virtual design service, communication becomes even more important since you won’t have the benefit of pointing things out in person. A solid brief ensures nothing gets lost in translation and sets both of you up for a smooth, efficient consultation where you spend time on creative decisions instead of backtracking to gather basic information.

Walking into your first designer meeting with a prepared brief changes everything. Instead of fumbling through Pinterest screenshots on your phone or trying to describe that blue you like, you’ll present a clear vision that respects both your time and your designer’s expertise. They’ll spend the consultation solving your design challenges rather than playing twenty questions about your budget or what you actually want.

This preparation matters even more for virtual consultations, where you can’t just gesture at a wall or show fabric samples in person. A solid brief becomes your communication lifeline, ensuring nothing gets lost in translation across video calls and emails.

You’ve got all the tools you need now. Start with one task today, maybe measuring your space or creating that Pinterest board, and build from there. The brief doesn’t need to be perfect; it just needs to reflect your real needs and constraints honestly. Your designer will appreciate the effort, and you’ll walk away from that first meeting with actionable next steps instead of vague ideas.

The homes that truly work are built on clear communication from day one. You’re already ahead by thinking about this before you even book that consultation.