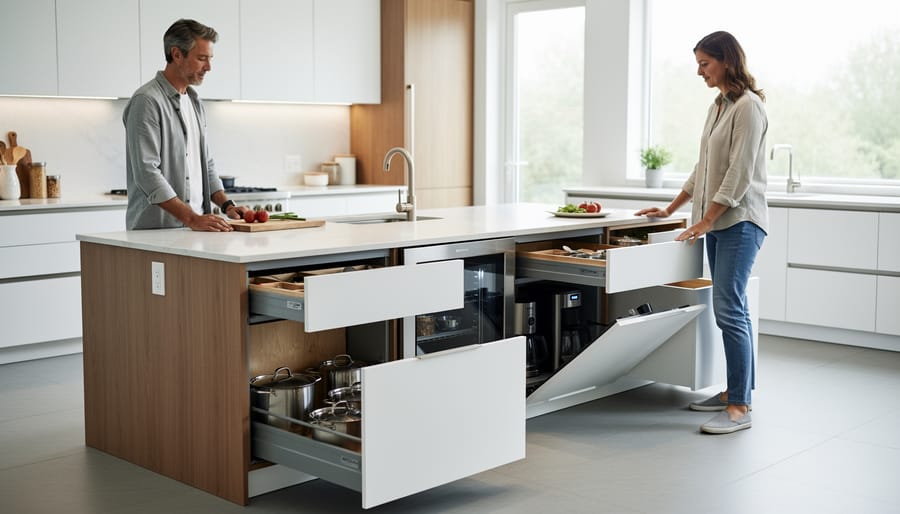
How to Plan Kitchen Island Storage Without Crowding Your Space
Planning kitchen island storage without crowding comes down to one core principle: reserve 42 to 48 inches of clearance on all working sides of your island, then design your storage inward from those boundaries. This approach flips the usual process. Instead of choosing cabinetry first and hoping it fits, you’re claiming the movement space your kitchen needs, which naturally prevents that boxed-in feeling while giving you a clear footprint to fill with smart storage.
The truth is, most kitchen islands feel cramped because homeowners design from the inside out. They pick a beautiful island, load it with drawers and shelves, then discover they can’t open the dishwasher and a cabinet door at the same time. Or two people can’t pass each other comfortably. You want your island to add function, not create a traffic jam.
Here’s the good news: with the right planning sequence, you can pack your island with pull-out trash bins, deep pot drawers, appliance garages, and all the organizational features you’re craving without sacrificing an inch of breathing room. Virtual design tools have made this process incredibly accessible in 2026. You can map your exact kitchen dimensions, test different island configurations, and preview sightlines before you commit to anything permanent.
This guide walks you through the complete planning process, from measuring your existing traffic patterns to choosing storage components that maximize capacity in a smaller footprint. You’ll learn exactly where to prioritize drawer depth, how to verify your plan actually works, and which storage mistakes create the crowded feel you’re trying to avoid.
What You’ll Need to Get Started
You don’t need a shopping cart full of supplies to plan your island storage effectively, just a few simple tools and a clear head. Starting with the right planning essentials saves you from expensive redesigns and ensures your island enhances your kitchen rather than overwhelming it.
Here’s what you’ll need to begin:
- Measuring tape (25-foot minimum to capture full room dimensions)
- Graph paper or a digital room planning app like RoomSketcher or Planner 5D
- Kitchen work triangle guidelines (available free from design resource sites)
- Storage inventory list documenting what you need to store and how often you use it
- Clearance requirements reference showing minimum walkway widths and door swings
Digital tools make the process easier and more accurate. Most room planning apps let you input exact measurements, then drag and drop island configurations to test different sizes and placements. You can see instantly whether a 4-foot or 6-foot island fits your space without crowding pathways.
If you want to visualize your plan in realistic 3D before committing to construction, virtual design consultations offer that clarity. Working with professionals like the team at Canadian Custom Cabinets through A Design Difference services gives you access to rendering tools that show exactly how your planned island will look and function in your actual kitchen. This removes the guesswork and prevents that sinking feeling of realizing too late that something doesn’t work.
Proper planning tools aren’t about complicating the process, they’re about making smart decisions you’ll appreciate every single day.
Critical Clearances and Space Requirements
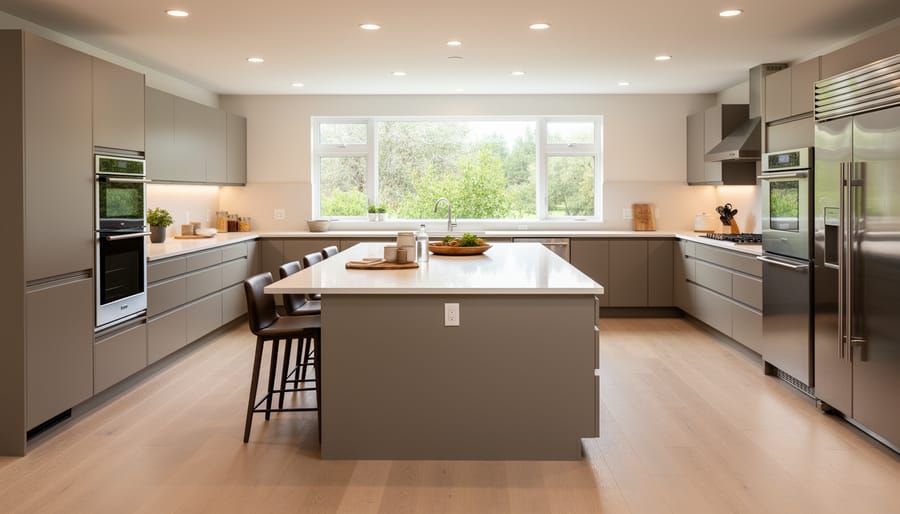
Before you choose storage options or pick cabinet styles, you need to nail down the non-negotiable measurements that keep your kitchen functional and safe. These clearances aren’t suggestions, they’re the foundation that determines whether your island enhances your space or turns it into an obstacle course.
The absolute minimum clearance around any side of your island is 36 inches. This allows one person to work comfortably and provides enough space to open cabinet doors and appliances without blocking the entire kitchen. However, 42 to 48 inches is the sweet spot for most kitchens, especially if multiple people cook together or you have appliances that swing open (like dishwashers or refrigerators near the island). That extra foot makes the difference between squeezing past someone and moving freely.
The work triangle principle, the path between your sink, stove, and refrigerator, should remain unobstructed by your island or cross through it intentionally as a work zone, not a traffic lane. When islands interrupt this flow awkwardly, you end up walking extra steps for every meal or colliding with family members passing through.
Traffic patterns matter just as much. If your kitchen connects two rooms, people will walk through it regardless of your island placement. Position the island so through-traffic flows around the work zones, not directly through them. Test this by imagining someone carrying a laundry basket from the garage to the bedrooms while you’re cooking, where do they naturally walk, and does your planned island force an awkward detour?
Doorways need consideration too. Measure from the island edge to any door in its swing path. You need the full door width plus at least 12 inches of standing space, or the door becomes a battering ram every time someone enters.
Step-by-Step Island Storage Planning Process
Step 1: Measure Your Kitchen and Determine Maximum Island Size
Start by measuring the entire kitchen floor space. Use a measuring tape to record the length and width of the room in feet, then sketch it on graph paper or enter the dimensions into a digital planner.
Now comes the critical calculation. Subtract the minimum clearances from each side where the island will sit. If your kitchen is 12 feet wide and you need 42 inches (3.5 feet) of clearance on both sides for walkways, that leaves 5 feet for the island’s width (12 – 3.5 – 3.5 = 5). Repeat this for length.
Here’s a practical example: a 14-foot by 12-foot kitchen with 42-inch clearances on all sides can accommodate an island roughly 7 feet long by 5 feet wide. That’s your maximum footprint before the space starts feeling cramped.
Don’t forget to account for appliance doors, cabinet swings, and the refrigerator opening. Measure these and mark them on your sketch. An island that blocks the dishwasher door isn’t just inconvenient, it makes the kitchen unusable.
This calculation gives you a realistic size limit that respects both function and breathing room.
Step 2: Inventory Your Storage Needs
Before you can design storage that works, you need to know exactly what you’re storing. Grab a notebook and walk through your kitchen. Write down everything currently crammed into cabinets, scattered on counters, or taking up space you wish it didn’t.
Group items into categories: everyday cookware (the pots and pans you use weekly), small appliances, baking supplies, serving pieces, pantry overflow, and specialty items. Be honest about frequency, that waffle maker you’ve used twice in three years doesn’t deserve prime real estate.
This is where understanding active versus passive storage becomes crucial. Active storage holds items you reach for daily or several times a week, mixing bowls, cutting boards, cooking utensils, your go-to skillet. These belong in easy-access drawers and cabinets on your island’s working side. Passive storage houses things you need occasionally but not constantly: the stand mixer, holiday platters, extra serving bowls, bulk pantry items. These can go in deeper cabinets, lower drawers, or less convenient spots.
Prioritizing this way prevents you from building storage you don’t actually need, which keeps your island from becoming bulkier than necessary.
Step 3: Choose Storage Types That Maximize Space Efficiency
Now that you know what needs storage and how much island space you have, it’s time to choose the right storage types. This matters because not all cabinets are created equal, some pack twice the function into the same footprint.
Start with pull-out drawers instead of traditional cabinets wherever possible. Deep drawers give you complete visibility and access to everything inside, while cabinets hide items in dark corners where they’re forgotten. A 24-inch-wide drawer stack can hold as much as a 36-inch cabinet because you’re not wasting space reaching around door hinges.
Think vertically to use every inch of height. Vertical dividers for baking sheets and cutting boards, stacked drawer units, and tall pull-out pantries all maximize capacity without expanding the island’s footprint. A vertical tray divider takes up just 3 inches of width but stores a dozen items that would otherwise lay flat and consume precious surface area.
Corner storage deserves special attention. Lazy Susans, pull-out corner drawers, and LeMans units transform awkward corner dead zones into accessible storage. Without these solutions, you lose 40-50% of potential corner space.
Built-in organizers, utensil dividers, spice racks, knife blocks, keep contents tidy and visible. When everything has a designated spot, you need less overall storage because nothing gets lost or doubled up. The result is an island that stores more while looking streamlined and uncluttered.
Step 4: Map Storage Zones to Island Sides
Once you’ve chosen your storage types, it’s time to think strategically about where each function belongs. Not all sides of your island are created equal, some face your main work zones, while others sit in traffic paths where people walk through.
Start by identifying your island’s “working side”, the face closest to your sink, stove, or primary prep area. This is where you’ll store items you reach for constantly: everyday dishes, cooking utensils, cutting boards, and frequently used pots. Keeping these items on the working side means you’re not constantly walking around the island or reaching across traffic lanes.
The sides that face doorways or major walkways should house less-accessed storage or serve as display areas. Think seasonal serving pieces, extra pantry overflow, or open shelving with decorative items. You don’t want to be retrieving a mixing bowl from the traffic side while someone’s trying to walk through with groceries.
If your island includes seating, the diner-facing side works well for napkins, placemats, or kid-friendly items they can access themselves. This creates logical zones that keep the cook’s workflow smooth while preventing congestion around the island’s perimeter.
Step 5: Select a Visual Style That Feels Light and Open
Once you’ve mapped your storage zones, it’s time to choose finishes and features that keep your island from feeling like a visual anchor weighing down the room.
Color makes the biggest immediate impact. Light tones, whites, soft grays, natural wood finishes, reflect more light and recede visually, making the island feel less massive than dark, saturated colors. If you love contrast, save darker hues for a waterfall edge or isolated accent rather than the entire cabinet run.
Storage configuration matters as much as color. Floor-to-ceiling panels create an imposing wall effect, while raising the island base on legs or a plinth creates visual breathing room underneath. Even a few inches of visible floor makes the piece feel lighter.
Mix closed and open elements strategically. One section of open shelving breaks up a long cabinet run and adds lightness, but resist covering every side with open shelves, you’ll end up with visual clutter that defeats the purpose. Glass-front cabinets split the difference, offering display space that still contains visual noise.
Slim hardware and minimal details keep things airy. Chunky crown molding, ornate corbels, and oversized pulls add visual weight. Flat-panel doors, simple handles, and clean lines maintain the open feel you worked so hard to plan. The island should complement your kitchen, not dominate it.
Smart Storage Solutions That Don’t Eat Up Space
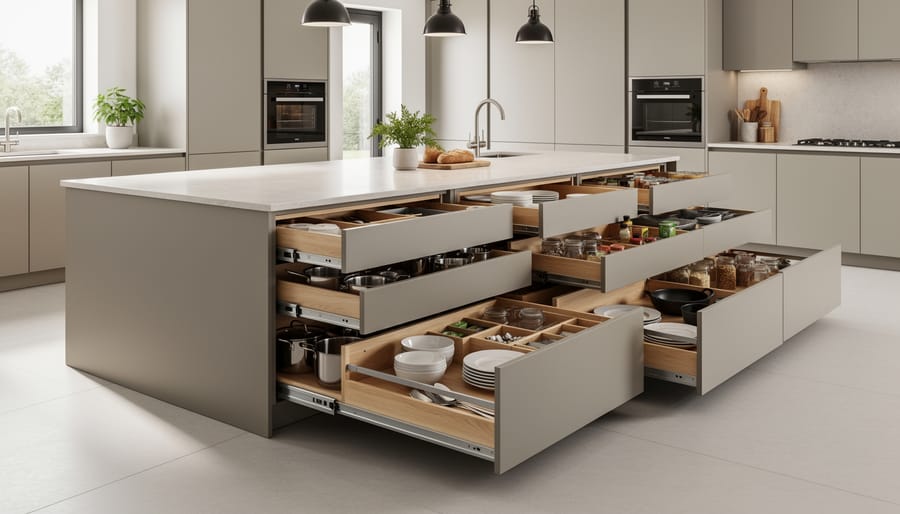
The right storage solutions turn your island into a hardworking piece without making it feel like a bulky obstacle. These ideas pack serious function into smart configurations that keep sight lines open and the room feeling spacious.
Start with toe-kick drawers along the island’s base. That 4-inch gap between the cabinet bottom and floor usually goes to waste, but shallow drawers there are perfect for baking sheets, cutting boards, or table linens. You gain storage without adding visual bulk because the drawers sit in a space your eye naturally overlooks.
Appliance garages built into one end of the island hide toasters, blenders, and coffee makers behind tambour doors or lift-up panels. When closed, you see a clean cabinet face instead of countertop clutter. Position these on the side facing away from main traffic to keep counters clear where you work most.
Vertical dividers inside deep drawers or cabinets organize baking trays, pot lids, and serving platters on edge rather than stacked. This cuts the fumbling and makes everything visible at a glance, so you actually use the full depth without creating a black hole where items disappear.
Here are additional solutions that maximize capacity while preserving the open feel you want:
- Breakfast bar with open shelving underneath displays cookbooks or baskets while maintaining visual flow through the kitchen
- Pull-out trash and recycling bins keep unsightly receptacles hidden without dedicating cabinet space
- Corner storage with lazy Susans or pull-out mechanisms accesses awkward spaces that would otherwise go unused
- Narrow spice pull-outs between larger cabinets utilize 3-6 inch gaps that can’t fit standard drawers
- Hanging pot racks suspended above the island free up cabinet space and showcase attractive cookware
Glass-front cabinets on one side create the illusion of more space by letting light pass through while still providing closed storage. Stock them with matching dishes or glassware for a curated look that doesn’t feel heavy.
The key is choosing three or four of these solutions that match your specific needs rather than cramming in every option. Your island should solve your storage problems without becoming one itself.
How to Test Your Plan Before Committing
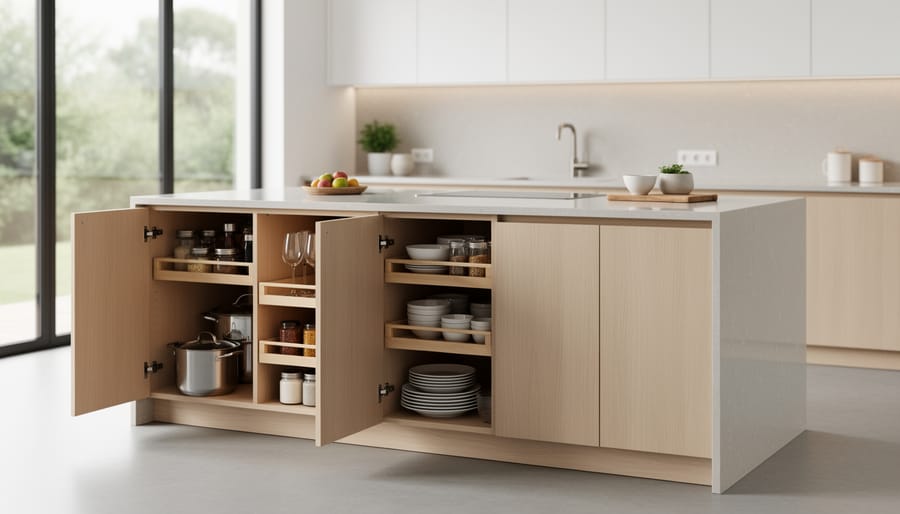
Before you order a single cabinet, test your island plan in real space. Use painter’s tape to mark the exact footprint on your floor, including the depth and any overhangs. Live with this mock-up for three to five days, moving through your normal kitchen routines. Open the refrigerator and dishwasher. Walk the path from sink to stove with a pot in hand. Notice if you’re sidestepping the taped outline or if family members naturally flow around it without comment.
If you find yourself squeezing past the outline, bumping into corners, or feeling the space has shrunk, your island is too large. Reduce the depth or length by six inches and test again. Pay attention to cabinet doors and appliance doors swinging open, they shouldn’t collide with the island perimeter.
For a more polished preview, cardboard boxes stacked to counter height give you a three-dimensional sense of how the island affects sight lines and the room’s openness. You’ll quickly see if the mass feels too heavy or blocks natural light paths.
Virtual tools take this further. Through A Design Difference’s online design process you can see photorealistic 3D renderings of your planned island in your actual kitchen. This virtual visualization shows exactly how storage configurations, materials, and colors will look before construction begins. When you brief your designer with your measurements and storage list, they can adjust dimensions digitally until the balance between storage capacity and open space feels right.
If your mock-up passes the living-with-it test and you’re moving comfortably, you’re ready to move forward with confidence.
Common Questions About Island Storage Planning
What if my kitchen is too small for an island?
Consider a narrow rolling cart (18-24 inches deep) that can be moved when you need more floor space, or explore a peninsula attached to your existing cabinets. These alternatives provide storage without the permanent footprint that crowds a compact kitchen.
How much storage is too much?
If your island storage extends all the way to the floor on every side with solid doors, it can feel heavy and visually crowd the space. Aim for a mix of closed cabinets and open elements, leaving at least one side lighter or incorporating open shelving maintains an airy feel.
What’s the ideal island depth for storage and seating?
A standard 36-inch depth accommodates base cabinets on one side and comfortable seating on the other with a slight overhang. If you want storage on both sides, 42-48 inches works, but verify you still have adequate clearances around the island before committing.
Can I add more storage to my island later?
Yes, if you’ve planned clearances correctly from the start. You can install organizational inserts, add baskets to open shelving, or incorporate hanging rails above the island. The key is ensuring your initial footprint allows room for these additions without encroaching on walkways.
Remember that successful island storage planning creates seamless design where function and flow work together. The goal isn’t cramming in maximum storage, it’s finding the right amount that serves your needs while keeping the kitchen comfortable to move through. If you’re uncertain whether your plan strikes this balance, living with a taped-out footprint for several days reveals whether the proportions genuinely work for your household’s daily patterns.
You’ve walked through the measurements, mapped your storage zones, and tested your layout, now you have a solid framework for creating a kitchen island that truly works for your space. Planning kitchen island storage without crowding isn’t about fitting in as much as possible; it’s about choosing what matters most and arranging it thoughtfully so your kitchen feels open, functional, and inviting.
The best islands enhance how you cook and gather without dominating the room. If you’d like personalized guidance or want to see your plan come to life in 3D before you commit, A Design Difference offers virtual consultations that help you visualize exactly how your island will look and function in your kitchen. We can help you choose design services that fit your project and budget.
Your kitchen deserves storage that works hard and looks beautiful. With the steps you’ve learned here, you’re ready to design an island that brings both, without crowding an inch.
Leave a Reply