
How to Brief an Interior Designer Before Your First Meeting (and Get Better Results)
Briefing an interior designer before your first meeting takes about two to three hours of focused preparation, but it can save you weeks of back-and-forth and hundreds of dollars in revision fees. The process involves gathering visual inspiration, documenting your space with photos and measurements, listing your functional needs and budget parameters, and organizing everything into a clear, written brief that your designer can reference throughout the project.
Most first-time design clients walk into consultations unprepared, armed only with vague ideas like “I want it cozy” or a single Pinterest board. That approach wastes your consultation time on basic discovery questions instead of actual design strategy. Your designer can’t read your mind, and without concrete information about how you live in your space, what you’re willing to spend, and what success looks like to you, even the most talented professional will struggle to deliver results you’ll love.
Think of your brief as a creative roadmap. You’re not expected to have all the answers or make design decisions on your own. That’s what you’re hiring expertise for. But you do need to provide the raw materials: your lifestyle requirements, aesthetic preferences, practical constraints, and deal-breakers. The clearer and more thorough your preparation, the more your designer can focus on solving your specific challenges rather than guessing what matters most to you. This preparation works beautifully for virtual consultations too, where having everything documented upfront becomes even more valuable.
What You Need to Gather Before Your Consultation
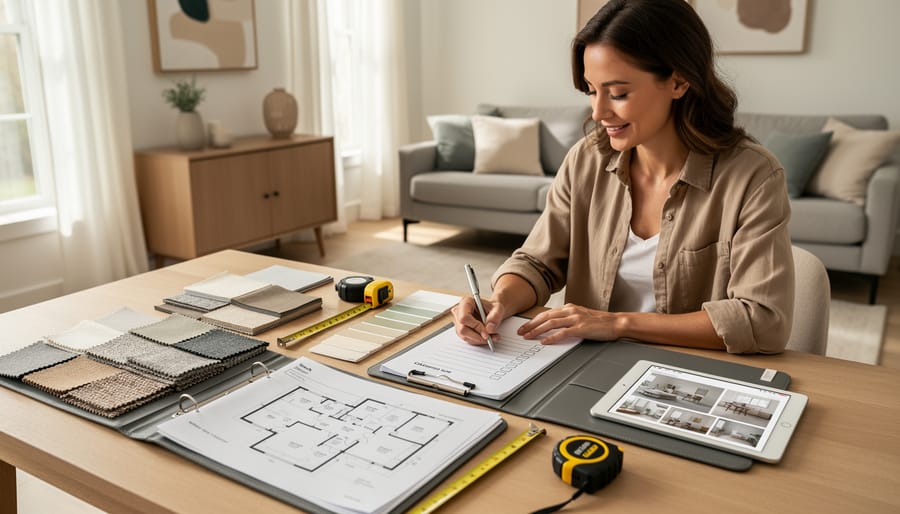
Before you meet with an interior designer, gathering the right materials transforms a vague conversation into a focused, productive session. Think of this as building your design toolkit, the more organized you are, the better your designer can help you. Whether you’re working with a Sydney interior design studio or connecting virtually, these essentials ensure you get the most from your first consultation.
Start with your budget range. You don’t need an exact figure down to the dollar, but knowing whether you’re working with $5,000 or $50,000 changes everything about what’s possible. Be honest here, designers aren’t there to judge your budget, they’re there to maximize it.
Next, measure your space accurately. Grab a tape measure and record room dimensions, ceiling heights, window sizes, and door locations. Include any awkward architectural features like columns, sloped ceilings, or radiators that can’t be moved. Rough sketches with measurements beat perfect floor plans with no numbers.
Photograph your current space from multiple angles. Capture each room from different corners, close-ups of problem areas, and details like light switches or outlets that might affect furniture placement. Take these photos during daylight to show natural light conditions, it matters more than you’d think.
Here’s your complete gathering checklist:
Budget range (realistic minimum and maximum you can spend)
Room measurements (length, width, height, windows, doors)
Current space photos (multiple angles, daylight conditions)
Inspiration images (Pinterest boards, magazine clippings, saved photos)
Timeline expectations (when you need the project finished)
Must-keep items (existing furniture or fixtures you want to retain)
Functional requirements (storage needs, how you use each space)
Collect inspiration images that genuinely speak to you, not what you think looks impressive. Twenty images that make you feel something beat two hundred random saves. Note what specifically draws you to each, is it the color, the layout, the lighting, or the overall mood?
Document your timeline realistically. If you’re hosting a wedding in three months, say so. If you have flexibility, mention that too. Designers can adjust their approach based on urgency, but they need to know upfront.
Finally, list any existing pieces you want to keep. That vintage dresser from your grandmother or the sofa you just bought, designers can work around these anchors, but only if they know about them from the start.
Questions to Ask Yourself (Before the Designer Asks You)
Before your designer asks probing questions in that first consultation, take time to answer them yourself. This self-reflection exercise transforms vague ideas into concrete direction, making you a better collaborator and helping your designer deliver solutions that actually fit your life.
What’s genuinely not working in your current space? Be specific. “The living room feels off” is harder to solve than “We can’t all sit together comfortably when we have guests” or “There’s no good spot to put drinks down.” Identify the functional frustrations, not just aesthetic ones. Does the morning light blind you at your desk? Is there nowhere to drop keys and bags when you walk in? These pain points guide practical solutions.
How do you actually use each room? Your dining room might double as a homework station. Your bedroom might need to function as a reading retreat. If you’re planning a home office layout, think about whether you take video calls, need dual monitors, or require soundproofing from the rest of the house. The gap between how rooms are supposed to be used and how you actually live in them reveals what your design needs to accommodate.
What’s your absolute non-negotiable must-have? Maybe it’s keeping your grandmother’s sideboard, accommodating your massive book collection, or ensuring the new sofa fits your two large dogs. Identify the one or two things that genuinely can’t be compromised, so your designer works around them rather than suggesting you get rid of them halfway through the project.
What design styles make you feel at home? You don’t need to know whether you’re “modern farmhouse” or “transitional.” Instead, think about spaces where you’ve felt comfortable and energized. Was it a friend’s cozy, layered living room or that clean-lined hotel lobby? Do you gravitate toward warm woods or sleek metals? Answering these questions in your own words gives your designer authentic insight into your preferences, which matters more than correctly labeling a style.
How to Create Your Design Brief Step-by-Step
Organizing Your Visual Inspiration
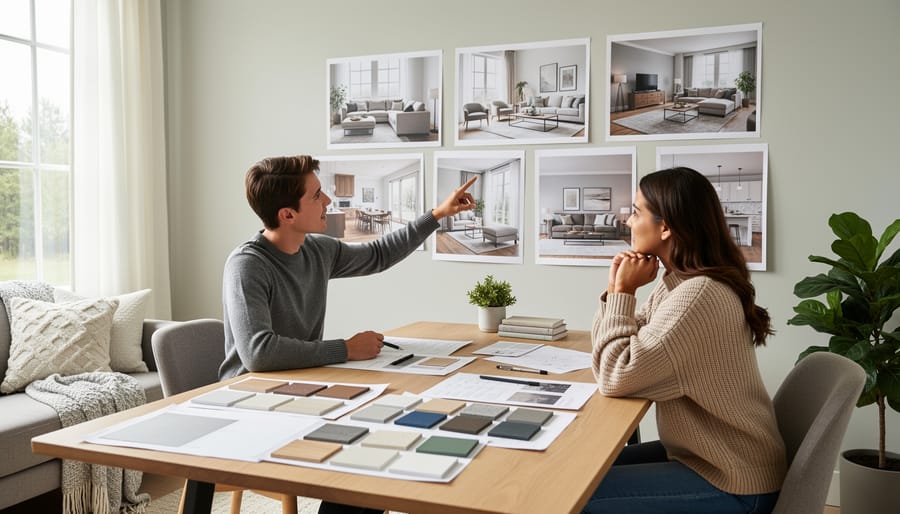
Start by creating one main digital folder or Pinterest board labeled with your project name and date. Inside, organize your inspiration images into specific categories: “color schemes I love,” “furniture styles,” “room layouts,” and “specific details” (like lighting fixtures or tile patterns). This structure helps your designer spot patterns in what you’re drawn to, rather than wading through a random collection of pretty rooms.
Aim for 10-15 images total across all categories. Quality beats quantity here, a focused selection reveals your preferences much faster than 200 saved pins. If you’ve got more, narrow it down by asking yourself: “What specifically am I showing my designer with this image?” Delete anything that’s just generally nice but doesn’t illustrate a clear preference.
Label or annotate your favorites with quick notes. Write “love this paint color, not the furniture” or “want this exact layout for our kitchen.” These clarifications prevent your designer from guessing which element caught your eye. For virtual consultations, save everything in a shareable format, a Google Drive folder, Dropbox link, or shared Pinterest board your designer can access before your meeting. Don’t email 50 attachments; one organized link is infinitely more useful.
Documenting Your Functional Needs
Your designer needs to know how you actually live in your space, not just how you imagine it should look. Start by listing the activities that happen in each room. Does your living room double as a home office on Tuesdays and Thursdays? Do your kids do homework at the kitchen table every evening? These details shape everything from furniture placement to lighting choices.
Document your storage honestly. Count how many coats actually hang by your door, how many pairs of shoes pile up in the entryway, where toys tend to migrate. If you’re constantly tripping over gym bags or stashing mail in random drawers, write that down. A good brief acknowledges real clutter patterns rather than pretending they don’t exist.
Traffic flow matters more than most people realize. Note where people naturally walk through rooms, which doors get used most, where pets sleep or play. This information helps your designer create seamless design that works with your daily routines instead of against them.
Be specific about lifestyle factors. “We entertain” is vague. “We host dinner parties for six people monthly and need flexible seating” gives your designer something actionable. The same goes for work-from-home setups, pet accommodations, or accessibility needs.
Presenting Your Information for Virtual Consultations
Virtual consultations require a slightly different approach to presenting your brief. Share everything digitally before your meeting, most designers prefer PDF documents that won’t lose formatting across different devices. Name your files clearly: “Smith_Living_Room_Measurements.pdf” works better than “IMG_4783.jpg”.
For photos, bigger is better. Take images in landscape mode with good natural lighting, capturing whole walls and corners rather than artistic close-ups. Upload originals to a shared folder on Google Drive or Dropbox instead of texting compressed versions that lose detail. Your designer needs to see that scuff on the baseboard and the weird angle where your ceiling slopes.
Organize everything into clearly labeled folders: Measurements, Current Space Photos, Inspiration, Furniture to Keep. Many designers who run an online design process will provide a specific intake form or template, but having your materials ready means you can complete it quickly and thoroughly. Test your sharing permissions before the meeting, there’s nothing worse than spending half your consultation troubleshooting file access instead of talking about design.
Common Briefing Mistakes to Avoid
Even the best intentions can get lost without the right preparation. These common briefing mistakes waste valuable consultation time and can lead to designs that don’t actually work for your life or budget.
The biggest pitfall is dancing around your real budget. Designers need honest numbers to create plans you can actually implement. If you say “flexible” when you mean $5,000, you’ll end up with a $15,000 proposal that excites you but goes nowhere. Be specific about what you can spend, and include whether that’s for design fees only or for the entire project including furniture and materials.
Another mistake is showing wildly conflicting inspiration images. If your Pinterest board jumps from minimalist Scandinavian to maximalist bohemian to industrial loft, your designer won’t know which direction actually speaks to you. It’s fine to like different styles, but identify what specifically draws you to each image so your designer can find the common thread.
Guessing at measurements instead of measuring accurately creates real problems. That sofa you love might not fit through your doorway, or the layout you’re imagining might leave you with twelve inches of awkward leftover space. Take the time to measure properly, including doorways, ceiling heights, and window placements.
Setting unrealistic timelines derails projects before they start. Saying you need a full home redesign in two weeks, or expecting custom furniture to arrive next month, sets everyone up for disappointment. Ask your designer about realistic timeframes during your consultation.
Finally, don’t skip lifestyle details. Mentioning that you have two large dogs or work from home three days a week isn’t oversharing, it’s essential information that affects every design decision. If you’re planning a paint color check, tell your designer about your lighting situation and daily routines so the colors work in real life, not just in the sample.
How to Know Your Brief Is Ready
Your brief is ready when it gives your designer a clear picture of who you are, what you need, and what success looks like for your space. Before you hit send or walk into that meeting, run through this quick verification checklist.
A complete brief should answer five essential questions: What’s your budget? What’s your timeline? How do you use the space? What style speaks to you? And what problems are you trying to solve? If your designer can answer all five from reading your brief, you’re in good shape.
Check that your photos actually show the space accurately, not just flattering angles. Your measurements should include ceiling height, window dimensions, and any architectural quirks like sloped ceilings or awkward alcoves. If you’ve listed “modern” as your style, make sure your inspiration images back that up rather than showing farmhouse kitchens and traditional moulding.
You’ll know you’re ready when a friend could read your brief and describe your project back to you without confusion. If parts feel vague or contradictory, your designer will feel that too.
Once your brief is complete, schedule your consultation with confidence. Share the brief 24-48 hours before your meeting so your designer can review it properly. This advance notice means they’ll arrive prepared with initial ideas rather than spending your first session just gathering information. You’ve done the groundwork, now you’re ready for the creative collaboration to begin.
Frequently Asked Questions
How detailed should my brief be?
Your brief should be thorough enough to communicate your vision and needs, but don’t stress about perfection. Include the essentials, budget, measurements, timeline, and lifestyle needs, then add as much visual inspiration and detail as feels comfortable. Most designers prefer a clear brief with too much information over one that’s too vague, since they can always ask clarifying questions.
Do I need a brief for a single room project?
Yes, even small projects benefit from a brief. A one-room redesign still requires budget boundaries, measurements, functional needs, and style direction. The brief might be shorter, but it’s just as valuable for making your consultation productive.
What if I don’t know my style yet?
That’s completely normal and your designer can help you define it. Gather images of spaces you’re drawn to, even if you can’t name the style, and note what you don’t like. This gives your designer starting points to ask the right questions and show you options that help clarify your preferences during the consultation.
Should I brief differently for virtual design services?
Virtual consultations need slightly more detail in your written brief and better quality photos since your designer can’t walk through the space in person. Make sure your measurements are accurate, include photos from multiple angles, and clearly label any existing furniture you’re keeping. The preparation process is otherwise the same.
Can I change my brief after the first meeting?
Absolutely. Your brief is a working document, and it’s common to refine your vision after discussing it with a professional. Send updates as you think of things or as your priorities shift, especially in the early stages of your project.
These questions come up frequently because first-time design clients worry about getting it wrong. The reality is that your brief is meant to start a conversation, not end it. Your designer will use it as a foundation and ask follow-up questions to fill in gaps or clarify contradictions. Think of it as giving them a head start rather than delivering a final exam, the goal is collaboration, not perfection.
If you’re working with a virtual design service, communication becomes even more important since you won’t have the benefit of pointing things out in person. A solid brief ensures nothing gets lost in translation and sets both of you up for a smooth, efficient consultation where you spend time on creative decisions instead of backtracking to gather basic information.
Walking into your first designer meeting with a prepared brief changes everything. Instead of fumbling through Pinterest screenshots on your phone or trying to describe that blue you like, you’ll present a clear vision that respects both your time and your designer’s expertise. They’ll spend the consultation solving your design challenges rather than playing twenty questions about your budget or what you actually want.
This preparation matters even more for virtual consultations, where you can’t just gesture at a wall or show fabric samples in person. A solid brief becomes your communication lifeline, ensuring nothing gets lost in translation across video calls and emails.
You’ve got all the tools you need now. Start with one task today, maybe measuring your space or creating that Pinterest board, and build from there. The brief doesn’t need to be perfect; it just needs to reflect your real needs and constraints honestly. Your designer will appreciate the effort, and you’ll walk away from that first meeting with actionable next steps instead of vague ideas.
The homes that truly work are built on clear communication from day one. You’re already ahead by thinking about this before you even book that consultation.
Leave a Reply